 button
on the Tool bar
or choose a command "Compile project" from menu Generate.
button
on the Tool bar
or choose a command "Compile project" from menu Generate.If there are any generated results already, they will be deleted.
Defining work area
Before generating a project you can define an area from that you
want to create a Flash-based presentation by resizing and
moving of Bounds Frame object
by mouse Drag and Drop operation.
Also, you can use a keyboard:
- to move Frame press keys "Up", "Down", "Left", "Right";
- to change the size of Frame hold pressed "Shift" key and press keys "Up", "Down", "Left", "Right".
Compile project
As a result of compilation AtPresent Recorder generates
a presentation project that can be edited and published into Flash-based presentation by
AtPresent Editor(http://www.atpresent.biz/editor.html)
application.
Result will be placed into folder "%ProjectFolder%/generated/project for editor".
("%ProjectFolder%" - it is a folder in that current recorder project is stored)
To start compiling a project, click on button
on the Tool bar
or choose a command "Compile project" from menu Generate.
If there are any generated results already, they will be deleted.
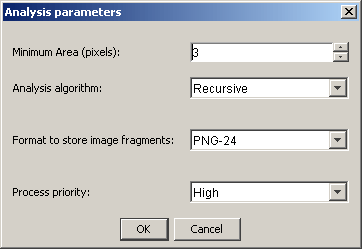
In opened dialog you should set analysis parameters:
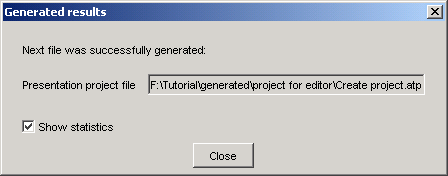
After project is compiled, a window "Generated results" will be opened.
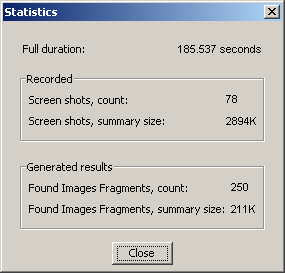
After project is generated a window "Statistics" will be opened.
Now you can open generated project in AtPresent Editor application (or import it in existing project) for further editing and publishing as a Flash-based presentation.
Generate HTML sequence
To save captured screenshots as HTML sequence choose a command
"Make HTML sequence" from menu Make.
Recorder will save all not equal selected by Bounds Frame object areas of screenshots to image files and create
a set of HTML files with these images that are linked "screen by screen".
Result will be placed into folder "%ProjectFolder%/generated/html".
(C) AtPresent Software Co. 2004-2005. All rights reserved.
 Return to Contents